# Sensors
Before any assessments can be carried out, a set of sensors must be assigned to the JAS app.
Setting up the JAS app is a simple process as usually the sensors will have already been assigned and calibrated for you in the pre-delivery process. However should you choose to purchase your own iPad or verify sensors are assigned correctly, check battery power of the sensors, check signal strength, power off sensors, reset them, or re-calibrate them then these simple procedures should be followed.
For all sensor operations select the Sensors tab.
# Assign
The Sensors tab will show which body region sensors are not yet assigned.
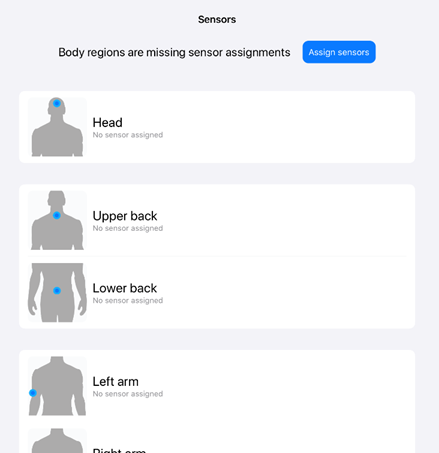
Click Assign sensors to start the process. The JAS app will immediately start looking for sensors in the vicinity of the iPad. Where there are more than 5 sensors it will lock onto the 5 closest sensors. Should it pick up any incorrect sensors move the spare sensors out of range and restart the process.
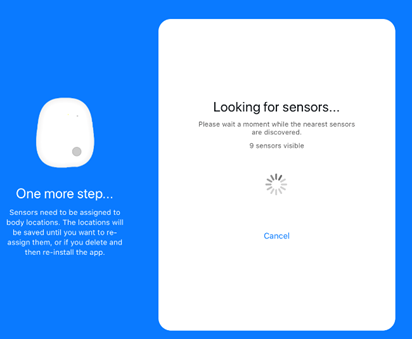
Once it has located 5 sensors the sensors will have their blue light turned on. Should the JAS app fail to find the sensors ensure they are charged and try again.
The JAS app will prompt for confirmation of which sensor should be assigned to which body region starting with Head. Pick up the sensor marked Head and click the grey button. The blue light will turn green confirming that the JAS app has successfully assigned the sensor to the Head region.
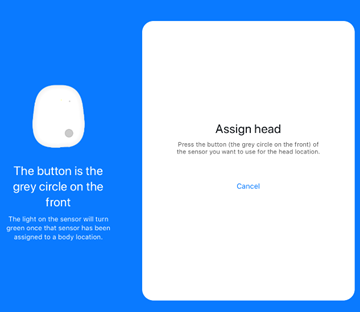
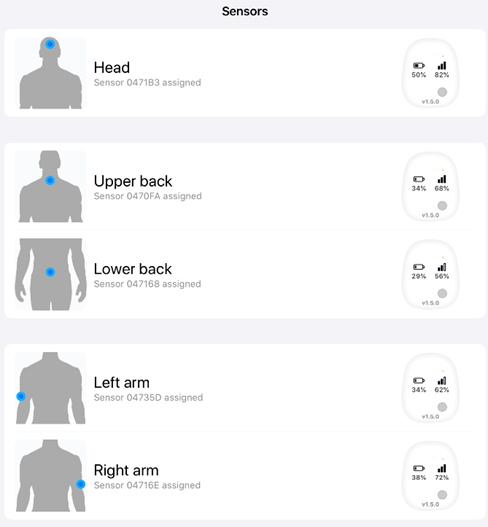
The JAS app will then move to the Upper back, Lower back, Right arm, Left arm regions. Repeat the process above by clicking the grey button of the corresponding marked sensor. Once all the sensors are assigned the sensor lights will return to blue and the sensor information will display on the JAS app.
# Re-assign
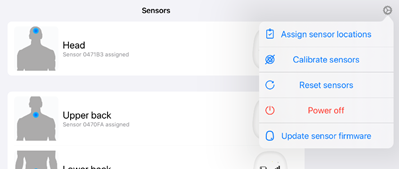
If there is a need to re-assign sensors to other body locations due to a sensor failure, operator error, sensor replacement or any other reason, click on the sensor settings icon in the top right-hand corner and click Assign sensor locations, then follow instructions for assigning sensors.
# Calibrate
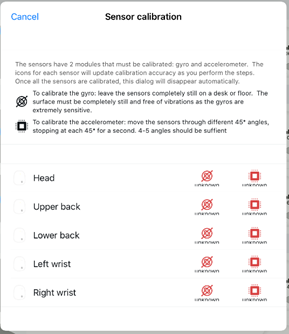
Sensors very rarely require re-calibration, even in extreme environments. CALIBRATE is used to set the sensor’s gyroscope and accelerometer.
If the status is set as “Unknown” and shown in RED, then it is possible that the sensors can provide inaccurate data.
To calibrate the sensors click on the sensor settings icon in the top right-hand corner and click Calibrate sensors.
To calibrate the Gyroscope, simply leave the sensors on a flat surface with the light up for 2-3 seconds. This tells the Gyroscope that they are in a still state. The Gyro symbol will turn green.
To calibrate the Accelerometer; move the sensors through different 45° angles stopping at each 45° angle for a second. 4-5 angles should be sufficient. The status will change to GREEN once each sensor has been re-calibrated.
The pop-up screen will disappear once the App has identified all sensors as being correctly calibrated.
# Reset
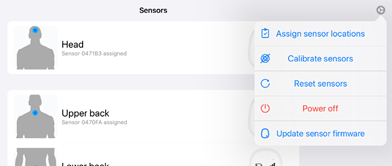
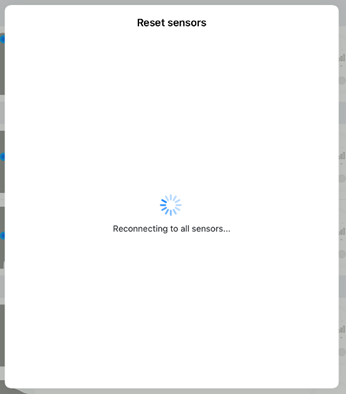
Resetting the sensors reboots them. This is a fully automatic process and requires no interaction from the user. To reset the sensors click on the sensor settings icon in the top right-hand corner and click Reset sensors.
The JAS app will briefly lose connection with the sensors while they reboot and then connect again automatically.
# Power off/on
If the JAS kit is not to be used for some time e.g. when being shipped to another location put the sensors into Sleep Mode by powering off the sensors.
To power off the sensors click on the sensor settings icon in the top right-hand corner and select Power off.
The blue lights on the sensors will turn off and the sensor information (power, signal) will no longer be shown on the JAS app.

To power the sensors back on open the JAS app and click on the Sensors tab. Press the grey button on each sensor then put them down. After a few seconds the sensor lights will turn blue and the sensor information will be available in the Sensor tab on the JAS app.
They can also be turned back on by opening the JAS app and then putting the sensors onto the charging unit.
If the sensors fail to power back on force close the JAS app (opens new window), ensure the sensors are charged by putting them onto the charging unit and then repeat the power back on process.
# Update firmware
Occasionally the firmware on the sensors will need to be updated. An alert will show when there is an available update. The sensors should be put onto charge before carrying out a firmware update. Internet access on the iPad is also required before a firmware update is carried out.
Firmware updates cannot be cancelled or reversed and no attempt should be made to cancel the update once it has started.
To update the sensor firmware click on the sensor settings icon in the top right-hand corner and click Update sensor firmware. A confirmation message will appear, click Update now to continue or Update later to cancel the update.

After clicking Update now the JAS app will work through each sensor updating the firmware.
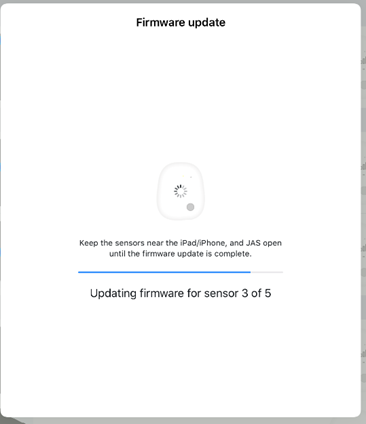
When the operation is complete, the sensors auto reset and are immediately available for use. They can now be removed from the charger.
# General operation
Once all the sensors are calibrated and assigned, when the JAS app is closed the sensor lights will go off and the sensors will be in standby mode. To start the sensors, simply open the JAS app and any pre-assigned sensors will be recognised ready for use.